HTTP Basics (1)

Concept
This lesson presents the basics for understanding the transfer of data between the browser and the web application and how to trap a request/response with a HTTP proxy.
이번 레슨은 브라우저와 웹 애플리케이션이 어떻게 데이터를 주고받는지와 어떻게 HTTP proxy로 중간에서 데이터를 가로챌 수 있는지를 보여준다.
Goals
The user should become familiar with the features of WebGoat by manipulating the above buttons to view hints, show the HTTP request parameters, the HTTP request cookies, and the Java source code. You may also try using OWASP Zed Attack Proxy for the first time.
사용자는 여러 가지를 버튼을 누르며 파라미터들을 보고 쿠키, 코드 등을 보며 WebGoat에 더 친숙해질 것이다. 당신은 또한 OWASP Zed Attack Proxy를 처음 사용할지도 모른다.
How HTTP works:
All HTTP transactions follow the same general format. Each client request and server response has three parts: the request or response line, a header section and the entity body.
모든 HTTP 통신은 같은 형식을 따른다. 클라이언트의 요청과 서버의 응답은 세 가지로 나뉜다: 요청과 응답 라인, 헤더 부분 그리고 바디 부분
The client contacts the server and sends a document request. A GET request can have url parameters and those parameters will be available in the web access logs.
GET /index.html?param=value HTTP/1.0
클라이언트는 서버와 만나서 요청 문서를 보낸다. GET 요청은 url 파라미터들을 포함할 수 있다. 그리고 그 파라미터들은 웹 접속 로그에서 이용 가능하다.
Next, the client sends optional header information to inform the server of its configuration and the document formats it will accept.
User-Agent: Mozilla/4.06 Accept: image/gif,image/jpeg, /
다음, 클라이언트는 설정과 문서 형식을 알리기 위해 부분적인 헤더 정보를 서버에 보낸다.
In a POST request, the user supplied data will follow the optional headers and is not part of the contained within the POST URL.
POST 요청에서는 사용자의 추가적인 데이터는 부분 헤더를 따른다 그리고 URL 에 포함되지 않는다.
지금까지의 내용을 요약하자면 "GET 요청에는 파라미터가 URL에 직접 드러나고 POST 요청에는 파라미터가 URL에서 직접 드러나지 않는다"라고 할 수 있다.
HTTP Basics (2)
당신의 이름을 input 필드에 적고 Go를 눌러라. 서버는 당신의 요청을 받고 역으로 사용자에게 입력을 보여줄 것이다.

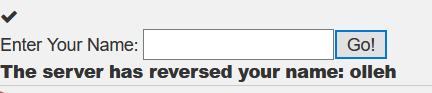
이름을 입력하면 이름을 거꾸로 출력한다.
HTTP Basics (3)

이번 문제에서 WebGoat는 Post 방식인지 GET 방식인지 맞추고 매직넘버도 입력하라.

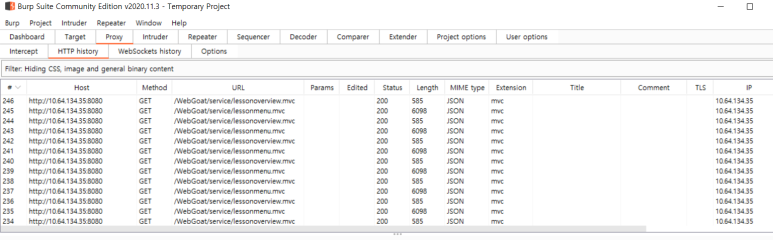
버프 스위트를 켜고 버프 스위트에서 자체적으로 제공하는 브라우저를 사용하겠다. Open Browser을 누르면 브라우저 창이 열린다. 다음으로 Intercept에서 Intercept On을 눌러서 Off로 바꾸면 아래 그림과 같이 HTTP History 창에 패킷들이 잡히기 시작한다.

입력폼에 아무거나 입력한다. 필자는 입력폼에 각각 hello, dd를 입력했다.
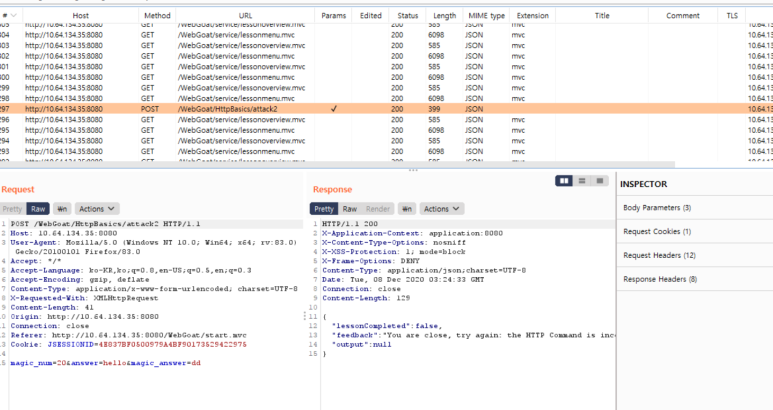
파라미터에 체크되어 있는 패킷을 보면 메소드는 POST이고 필자가 입력한 hello, dd 그리고 매직넘버가 적혀있다.

첫 번째 입력폼에는 POST 두 번째 입력폼에는 magic_num은 20을 입력한다.
성공!
'웹 해킹 > CTF' 카테고리의 다른 글
| [Square CTF] Password checker (0) | 2021.08.11 |
|---|---|
| [WebGoat] General - HTTP Proxies (0) | 2021.05.15 |
| [DIMI CTF] exec me (0) | 2021.03.25 |
| [DIMI CTF] simple sqli (0) | 2021.03.23 |
| [DIMI CTF] 5shared (0) | 2021.03.23 |


댓글